


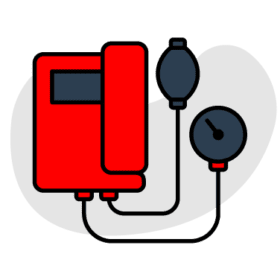


As a leading supplier of sphygmomanometers, stethoscopes, and scrubs for medical students and healthcare professionals, we’re committed to helping you excel in your field. Today, we’ll guide you through using a sphygmomanometer for blood pressure measurement.
Whether you’re a medical student perfecting your technique or a seasoned healthcare professional seeking a refresher, this step-by-step guide will ensure you get accurate readings with any sphygmomanometer.
Step-by-Step Guide to Blood Pressure Measurement with a Sphygmomanometer:
- Prepare the patient:
- Ensure your patient is seated comfortably with their back supported and both feet flat on the floor.
- The patient’s arm should be resting on a table or other support, with their palm facing upwards and the elbow slightly flexed.
- Locate the brachial artery:
- With the patient’s arm exposed, palpate (feel) the inner side of the elbow crease to locate the pulsation of the brachial artery.
- Wrap the cuff:
- Position the cuff about 1-2 inches (2.5-5 cm) above the elbow crease, ensuring it’s snug but not too tight. You should be able to slide two fingers under the cuff.
- Position the artery marker or the center of the bladder:
- If the cuff has an artery marker or a marker for the center of the bladder (the inflatable part inside the cuff), align it over the brachial artery. If there are no markings, estimate the middle of the cuff width-wise and center the bladder of the cuff over the artery.
- Secure the cuff:
- Fasten the cuff securely, ensuring it’s snug but not too tight.
- Position the stethoscope:
- Gently place the diaphragm (the flat, circular part) of the stethoscope over the brachial artery, just below the edge of the cuff.
- Inflate the cuff:
- Inflate the cuff by squeezing the bulb until the pressure gauge reads about 20-30 mmHg above the patient’s expected systolic pressure. If you’re unsure of the patient’s blood pressure, inflate the cuff to about 180 mmHg.
- Deflate the cuff:
- Slowly release the pressure in the cuff by opening the valve on the bulb. Aim for a deflation rate of 2-3 mmHg per second. Listen for the first Korotkoff sound (the first thumping sound) with the stethoscope. Note the reading on the pressure gauge when you hear the first sound; this is the systolic pressure.
- Continue deflating:
- Continue to deflate the cuff while listening for the disappearance of the Korotkoff sounds. The point at which the sounds disappear is the diastolic pressure. Note the reading on the pressure gauge when the sounds disappear.
- Record the results:
- Remove the cuff and record the blood pressure reading as systolic/diastolic pressure (e.g., 120/80 mmHg). Also, note the arm used for the measurement and any other relevant information.
At WiZmed, we offer a range of sphygmomanometers, some with markings and others without. Regardless of the type you choose, both can be used effectively for blood pressure measurement. The key is to practice and adapt your technique to the specific sphygmomanometer you are using. By following the steps outlined in this guide, you can ensure accurate blood pressure readings whether your cuff has markings or not. As always, our team at WiZmed is here to support you with high-quality medical equipment and resources to help you excel in your medical practice.